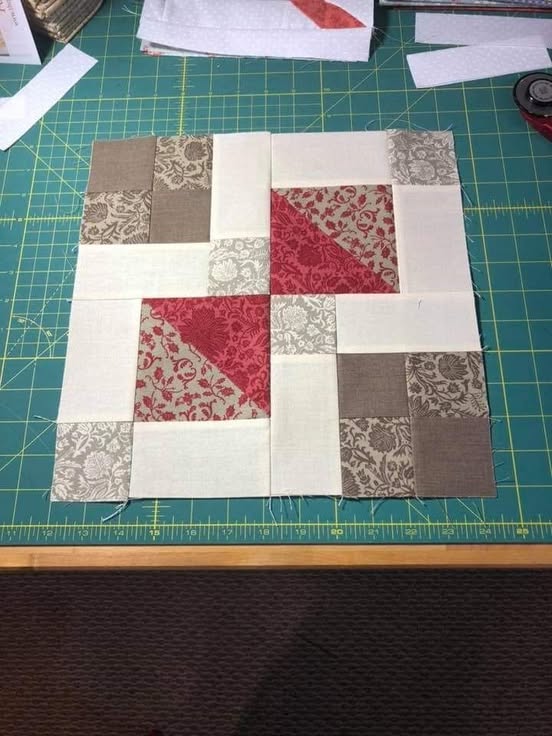
The Disappearing Nine Patch Quilt Pattern is a creative and fun quilting technique that transforms a simple block into a stunning design. This pattern is ideal for both beginners and experienced quilters looking for an easy yet visually striking project. In this tutorial, we will guide you step by step through the process of making a Disappearing Nine Patch Quilt, including fabric measurements, cutting techniques, and assembly tips.
The Disappearing Nine Patch is a quilt pattern created by making a traditional nine-patch block and then cutting it into four equal squares. These new blocks are rearranged to create a complex and dynamic quilt design. This technique allows for endless variations and color combinations.
One of the advantages of this pattern is its simplicity. Even though the final result appears intricate, the process involves basic cutting and stitching techniques. This makes it a great project for quilters of all skill levels.
Additionally, the Disappearing Nine Patch can be customized in many ways. Whether using bold prints, soft pastels, or holiday-themed fabrics, this quilt pattern adapts beautifully to any style and occasion.
Before starting, gather all necessary materials to ensure a smooth quilting experience. Having the right tools and fabrics will make the process more enjoyable and efficient.
Choosing the right fabric is crucial for this pattern. Mixing solids and prints will add dimension and contrast to your quilt, making the design more appealing. Pre-cut fabric packs, such as charm packs, are an excellent choice for this pattern.

The first step in making a Disappearing Nine Patch Quilt is assembling the traditional nine-patch block. This foundational block is made up of three rows of three squares each.
Start by selecting nine fabric squares of coordinating colors and arranging them in a three-by-three grid. The placement of colors and patterns will determine the overall look of the finished quilt.
Sew the squares together row by row, using a ¼-inch seam allowance. Press the seams open or to one side to create a flat and professional finish.
Once the nine-patch block is sewn together, the magic of the Disappearing Nine Patch begins. This step involves making precise cuts to transform the block into four new sections.
Using a rotary cutter and quilting ruler, cut the block vertically and horizontally through the center. This will create four smaller squares, each with a mix of different fabrics.
It is essential to cut accurately to ensure uniformity in the quilt. If the measurements are off, it may affect the final assembly of the quilt top.
Now that you have four smaller blocks, it’s time to rearrange them into a new pattern. This step gives the Disappearing Nine Patch Quilt its signature look.
Rotate some of the blocks to create a dynamic and asymmetrical design. You can experiment with different layouts until you find one that suits your vision.
This is where creativity comes into play. Changing the orientation of the blocks can significantly alter the final appearance, making each quilt unique.
After finalizing the layout, sew the blocks together row by row. The seams should align as closely as possible to maintain a polished look.
Use a ¼-inch seam allowance to join the pieces. Press the seams after sewing each row to keep the quilt top smooth and flat.
Once all rows are completed, sew them together to form the full quilt top. The result should be a beautifully intricate pattern created with minimal effort.
If desired, you can add a border to frame the quilt top and enhance its design. Borders can be made from solid fabric, patterned prints, or a combination of both.
Cut fabric strips in the desired width (typically 2 to 4 inches) and sew them around the edges of the quilt top. This step adds structure and visual appeal to the final piece.
Borders also help stabilize the quilt, making it easier to quilt and bind later in the process.
Once the quilt top is complete, it’s time to assemble the quilt layers. This includes the quilt top, batting, and backing fabric.
Lay the backing fabric right side down, place the batting on top, and position the quilt top right side up. Pin or baste the layers together to keep them secure during quilting.
Quilting can be done using a straight-line stitch, free-motion quilting, or hand quilting. Choose a method that complements the design and your skill level.
The final step in making a Disappearing Nine Patch Quilt is binding the edges. Binding gives the quilt a finished look and secures the edges.
Cut binding strips (typically 2.5 inches wide), sew them together to form one long strip, and attach it around the quilt edges using a sewing machine or hand-stitching method.
Once the binding is attached, press it neatly and hand-stitch the back for a professional finish. Your Disappearing Nine Patch Quilt is now complete and ready to be used or gifted!
The Disappearing Nine Patch Quilt Pattern is a fantastic way to create a visually complex quilt with minimal effort. By following these steps, you can make a beautiful quilt that looks intricate yet is simple to construct.
This pattern offers endless customization possibilities, making it perfect for experimenting with different fabrics and layouts. Whether you’re making a baby quilt, a throw, or a full-sized bed quilt, the Disappearing Nine Patch is a great choice.
[botao link={https://neighborhoodquiltclub.blogspot.com/2011/10/disappearing-nine-patch.html} texto={Quilt pattern} corfundo={#183396} corletra={#1e73be}]
With the right fabric selection and careful assembly, your quilt will be a stunning piece that showcases your creativity and quilting skills. Happy quilting!