RBD Block Challenge – Block 9 by Jill Finley: Step-by-Step Quilt Tutorial
Creating a quilt with a bold personality can be one of the most rewarding experiences for a quilter. And what better way to stand out than by making a giant rooster quilt that blends vibrant colors, artistic expression, and detailed craftsmanship? In this article, I’ll walk you through how I made a giant rooster, sharing fabric measurements, design tips, and a complete step-by-step guide to help you create your own masterpiece. Whether you’re a beginner or an experienced quilter, this project will ignite your creativity.
This rooster quilt pattern is not just fun, it’s also a powerful statement piece. It features bold contrasts, detailed piecing, and a proud profile that looks amazing hanging on a wall or displayed across a large bed. With carefully chosen fabrics and modern quilt patterns, this quilt will become a conversation starter in any room.
Let’s explore the design inspiration, materials you’ll need, and every step I took to bring this oversized rooster to life. If you’ve ever wondered how to create a custom, large-format quilt using animal imagery, this guide is for you!
The idea to create a giant rooster came from a love of farm life and rural Americana. Roosters are often seen as symbols of courage, morning, and pride. I wanted a quilt that captured this symbolism with powerful colors and clean lines.
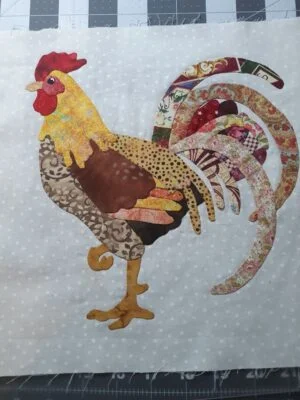
Using animal motifs in quilt patterns is nothing new, but this version is super-sized to grab attention. I sketched out several rooster profiles before settling on a final design that balanced symmetry with personality. The tail feathers, comb, and body all needed to be visually distinct.
The goal was to blend traditional quilting with modern design. By enlarging the rooster motif and using vibrant contrasting colors, I created something visually stunning that still felt deeply rooted in quilting tradition.
To start, you’ll need high-quality cotton fabrics in several colors. I recommend pre-washing your fabric to avoid shrinkage later. You’ll also need standard quilting tools like a rotary cutter, self-healing mat, and quilting ruler.
Background Fabric (light gray or off-white): 2 yards
Body Fabric (dark red): 1 yard
Comb and Wattle Fabric (bright red): ¼ yard
Beak Fabric (yellow or gold): ⅛ yard
Eye Fabric (black and white): scraps
Tail Feathers (blue, green, orange): ¼ yard each
Binding: ½ yard
Backing: 2½ yards
Batting: 60” x 60”
Don’t forget matching thread colors, safety pins for basting, and a walking foot if you plan to machine quilt.
Accuracy is key when cutting fabric for your quilt. Below are the measurements and pieces needed for each part of the giant rooster quilt pattern. Adjustments can be made depending on your desired final size.
6 rectangles: 6½” x 9” (main torso)
3 squares: 5½” x 5½” (shoulder and leg)
1 triangle (cut from 6” square, diagonal): chest area
5 strips: 4” x 12” (different colors)
2 wedges: 6” x 10” (accent feathers)
1 triangle: 6½” x 6½” (tail base)
2 curves: 3½” x 5” (comb)
2 teardrop shapes: 2” x 4” (wattle)
1 triangle: 2” x 2” (beak)
1 small circle: 1½” diameter (eye white)
1 dot: ½” diameter (eye pupil)
Cut various filler rectangles and squares to frame around the rooster and fill gaps, especially around tail feathers and neck.
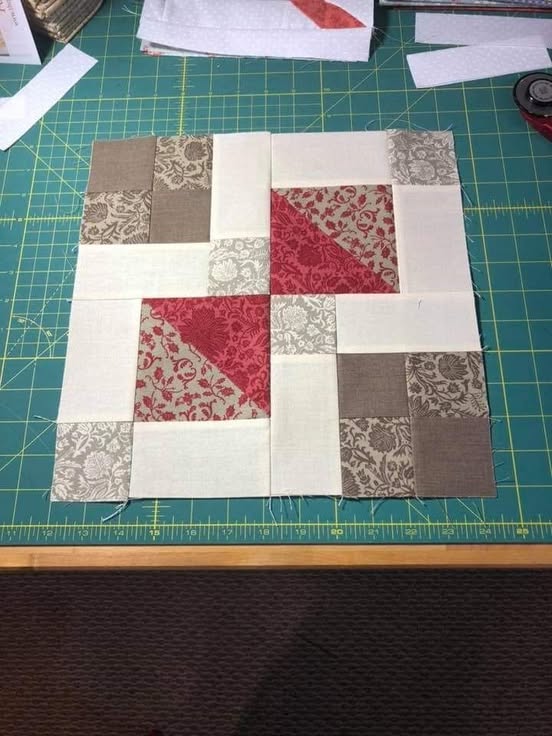
Start by organizing the body pieces on your design wall or workspace. Lay them out before sewing to ensure the rooster’s shape is symmetrical and proportional.
Begin with the torso, sewing the six large rectangles together into two rows of three. Add the shoulder and leg squares next. Then, attach the chest triangle to round out the shape. Use a scant ¼” seam allowance throughout.
Next, move to the tail feathers. Arrange them in a fan shape, staggering the strips and wedges. Sew them together and connect them to the torso. You may need to trim edges to fit the curve of the tail.
Finally, add the comb, wattle, beak, and eye. These should be appliquéd or carefully pieced depending on your comfort level. Use fusible webbing for easier placement, especially on curved pieces.
Once your quilt top is complete, it’s time to layer your quilt. Lay your backing fabric (wrong side up), then your batting, and finally your quilt top (right side up). Smooth out any wrinkles and pin or baste thoroughly.
For quilting, I chose a combination of outline quilting and free-motion quilting. I stitched around the rooster’s shape to define it and then added feather-textured quilting in the tail and body areas. In the background, I used echo lines to create a sense of movement.
You can use your walking foot for straight lines or a darning foot for more artistic free-motion designs. Choose a thread color that complements or blends into your background and rooster fabrics.
Once quilting is complete, trim the edges to square up the quilt. Prepare your binding by cutting 2½” wide strips and joining them end to end with diagonal seams. Press in half lengthwise and sew around the quilt edge with a ¼” seam allowance.
Fold the binding over to the back side and hand-stitch or machine-stitch in place. For a cleaner finish, miter the corners and tuck in the raw edges neatly.
Add a label to the back with the name of the project, your name, and the date completed. This gives your quilt a personal touch and marks your accomplishment for years to come.
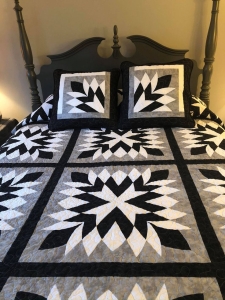
This quilt is a bold visual piece and deserves a prominent display spot. Hang it on a large wall using a sleeve or display it on a bed. If you’re entering local quilt shows, this could be your showstopper.
The vibrant color choices and oversized design make this quilt ideal for exhibitions or gallery-style settings. The rooster motif naturally draws the eye, and its symbolic presence resonates with many cultures.
Don’t forget to share your finished piece online! Use hashtags like #roosterquilt or #giantquilt to connect with others in the quilting community. You never know who you might inspire with your quilt patterns and creativity.
[botao link={https://www.youtube.com/watch?v=LRVUNClYtiw} texto={PATTERN HERE} corfundo={#183396} corletra={#fff}]
Making this giant rooster quilt was more than just a sewing challenge—it was a creative adventure. I got to combine color theory, precise piecing, and personal expression in a truly unique way. It reminded me why I fell in love with quilting.
This project pushed my limits, from drafting a unique quilt pattern to managing oversized fabric pieces. It also gave me a new appreciation for animal-themed quilts and the powerful imagery they can bring to a home.
I encourage every quilter to take on at least one “giant” challenge. Whether it’s a rooster, another animal, or a landscape, you’ll come out on the other side with more skills, more confidence, and a quilt that tells a story.