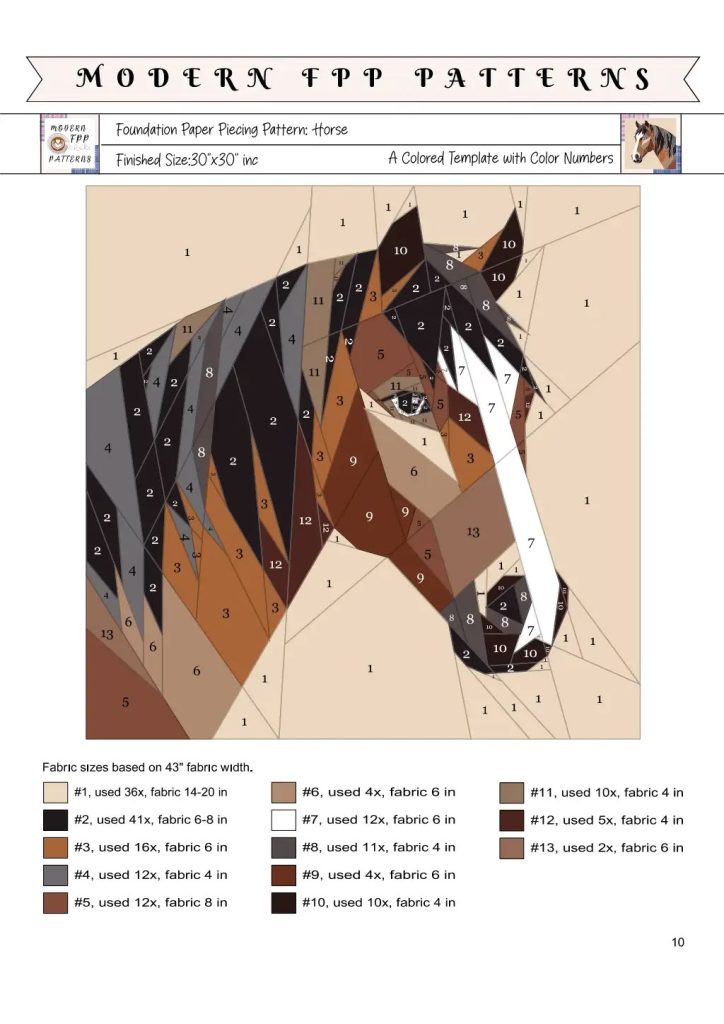
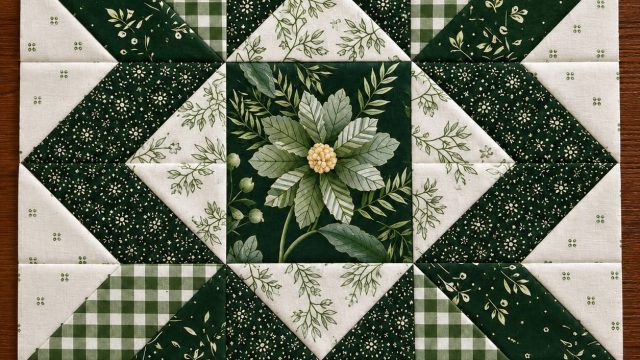
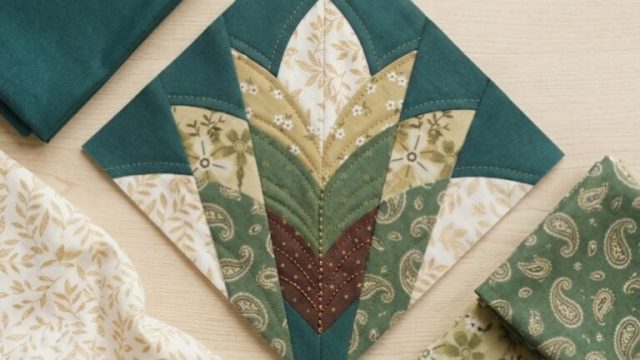
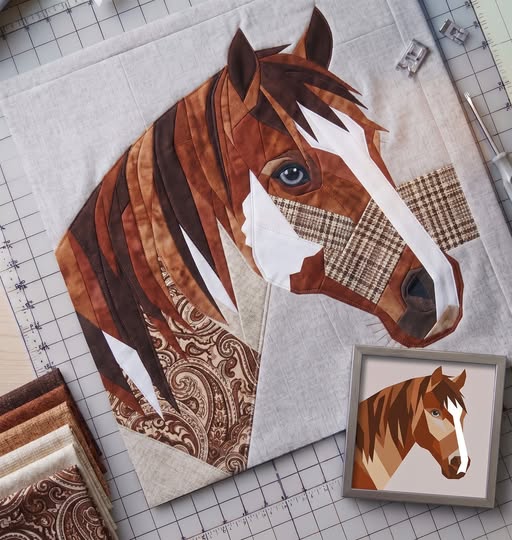
Horse Quilt Block Pattern is a striking quilting project that transforms carefully selected fabric pieces into a detailed horse portrait with impressive depth, movement, and personality. Inspired by the horse block shown in the reference image, this design combines warm brown fabrics, cream backgrounds, textured prints, and carefully shaped patchwork sections to create the recognizable head, muzzle, mane, ears, neck, and facial markings of a horse.
Although the finished Horse Quilt Block looks intricate, the project becomes much easier when it is divided into manageable sections. Instead of thinking about the horse as one complicated shape, the quilter can construct the neck, mane, face, muzzle, ears, and background independently before joining them. Precise cutting and a consistent seam allowance are particularly important because many of the visual details depend on angled seams meeting correctly.
Another advantage of this patchwork horse quilt pattern is its creative flexibility. Brown and chestnut fabrics produce a realistic horse like the inspiration, but the same construction method can be adapted for black, gray, palomino, paint, or completely imaginative horses. The completed block can become the centerpiece of a wall quilt, pillow, tote bag, barn-themed quilt, table decoration, or larger equestrian quilt.
Materials, Fabric Selection, Measurements, and Cutting Preparation
For a practical version of this Horse Quilt Block Pattern, aim for a finished block approximately 18 x 18 inches (45.7 x 45.7 cm). This generous size gives you enough space to create recognizable facial details without requiring extremely tiny pieces.
Use good-quality 100% quilting cotton whenever possible. The fabric should have enough stability for accurate piecing but remain easy to press. A combination of solids, tonal prints, batiks, and small-scale patterns works particularly well for the horse.
For the background, prepare approximately 1/2 yard (0.46 m) of cream, ivory, light beige, or pale gray fabric. A quiet background makes the horse silhouette easier to see.
For the main horse colors, collect approximately six to ten fat-eighth or scrap-sized pieces in chestnut, rust, cinnamon, chocolate, caramel, and dark brown. Scraps measuring 5–10 inches (13–25 cm) are useful for many individual sections.
Reserve a small amount of white or cream fabric for the blaze running down the horse’s face. Approximately an 8 x 12-inch (20 x 30 cm) piece should be more than sufficient.
For the muzzle and shadow areas, choose dark brown, charcoal brown, and medium brown fabrics. Using several values rather than one flat brown gives the portrait much greater dimension.
The mane benefits from the strongest value contrast. Prepare strips and irregular sections in dark chocolate, medium brown, copper, and chestnut. Alternating these fabrics creates the layered appearance visible in the reference.
You will also need a rotary cutter, self-healing cutting mat, acrylic quilting ruler, fine pins or fabric clips, iron, ironing surface, neutral sewing thread, sewing machine, and a fresh 70/10 or 80/12 quilting needle.
A 1/4-inch (6 mm) seam allowance is recommended throughout the pieced portions unless your chosen template specifically includes another allowance. Consistency matters more than speed.
Because this is a pictorial design, a paper-piecing or foundation-piecing method is especially useful. Divide the horse into several manageable units instead of trying to cut one enormous silhouette.
A convenient construction plan is to create approximately these sections: upper mane, lower mane/neck, ears and forehead, eye/cheek area, blaze, muzzle, jaw, and background fillers.
Before cutting your favorite fabrics, make a paper mock-up. Draw or print the horse outline at the desired finished size and divide the shape into angular sections corresponding to different fabric values.
Mark every paper section clearly. For example, use letters such as A1, A2, A3 for the mane and B1, B2, B3 for the face. Also mark the intended fabric color directly on your working copy.
Remember that foundation paper piecing produces a mirror image of the drawing. If the direction of the horse matters, reverse the master template before sewing.
Constructing the Horse Head, Blaze, Eye, and Muzzle
Begin the central portion of the Horse Quilt Block with the horse’s face. This area establishes the expression and should therefore receive the greatest attention to fabric placement.
Choose a medium chestnut fabric as the primary face color. Avoid extremely busy prints around the eye because they can compete with the facial details.
The forehead can be divided into several angled polygons. Rather than making the entire forehead from one fabric, alternate medium chestnut and slightly darker rust sections. These subtle changes simulate natural contours.
Next, construct the distinctive white facial blaze. In the inspiration, this marking begins broadly near the forehead and narrows irregularly toward the muzzle.
Create the blaze from several connected cream or white polygons rather than one perfectly straight strip. Slight changes in width make the marking appear much more natural.
Place medium and dark brown pieces along both sides of the blaze. These contrasting areas define the bridge of the nose.
The cheek can include a patterned brown fabric. A small plaid, check, or subtle geometric print adds visual interest while still coordinating with the realistic palette.
For the eye area, create a darker almond-shaped patch surrounded by medium chestnut. The actual eye can be appliquéd after the main piecing is completed.
Cut a small oval or almond shape from very dark brown or black fabric. Add a smaller gray-blue piece inside if you want the expressive appearance seen in the reference.
A tiny white highlight can be added with a very small appliqué piece or a few carefully placed embroidery stitches. The highlight should remain subtle.
Use fusible appliqué for extremely small facial details if traditional piecing becomes impractical. Combining foundation piecing and appliqué is completely appropriate for an art-style quilt block.
Move next to the lower face. The muzzle should gradually widen toward the nose, with angled pieces defining its shape.
Use medium brown for the central muzzle and dark chocolate around the nostril and lower edge. A darker fabric creates the illusion of depth.
The nostril can be a small curved appliqué in nearly black brown. Position it only after assembling the surrounding muzzle pieces so you can judge its placement accurately.
Join the face sections slowly. After each seam, press the fabric before attaching the next unit.
For paper piecing, reduce your stitch length to approximately 1.5–1.8 mm. The shorter stitches perforate the foundation paper and make it easier to remove later.
Trim each completed foundation section along its outer seam allowance before joining it to the neighboring section.
Frequently compare the developing horse with your master drawing. A small placement error around the eye or muzzle can noticeably change the animal’s expression.
Building the Mane, Ears, Neck, and Joining the Complete Block
The mane is one of the most dramatic features of this horse patchwork block. It should feel layered and directional rather than looking like a single solid mass.
Create individual mane sections using elongated triangles, wedges, and irregular strips. Alternate dark chocolate, chestnut, copper, and medium brown fabrics.
Orient each piece so that the angles point generally downward along the neck. This creates the impression that strands of hair are falling naturally.
Use darker fabrics between lighter sections to emphasize separation. The contrast creates much more visual movement than using several nearly identical browns.
Some mane sections can extend toward the forehead. Narrow pointed pieces are particularly effective for creating the forelock above the eye.
The lower mane should gradually merge into the neck. This area provides an excellent opportunity to use decorative fabrics such as paisley, floral, or tonal prints.
A large patterned fabric can create the impression of reflected light or texture across the horse’s neck. However, keep the most dramatic print away from the face so it does not become the visual focal point.
Construct each ear separately. Each ear can consist of a medium brown outer piece and a darker inner triangle.
Make the ears slightly asymmetrical for a more natural appearance. Perfectly identical ears can make an animal portrait look overly geometric.
Join the ears to small background sections before attaching them to the forehead. This approach is generally easier than inserting tiny background pieces afterward.
Next, construct the upper neck and lower neck sections. Follow the direction of the horse’s anatomy by using angled seams that flow downward from the jaw toward the shoulder.
When all major horse sections are finished, lay them together without sewing. Check the silhouette from several feet away.
The horse should remain recognizable even before the eye and other tiny details are added. If the outline feels unclear, adjust the contrast between the horse and background before proceeding.
Join small sections into progressively larger units. Avoid attempting to join every tiny piece individually across the complete block.
For example, combine the mane unit, face unit, muzzle unit, and neck unit separately. Then sew those major units together.
Pin or clip carefully at important intersections. Match the edges around the forehead, jaw, blaze, and mane.
Press each joining seam before adding another major unit. For bulky intersections, pressing seams open can reduce thickness.
Add cream background sections around the horse after the main portrait has been assembled. Use large background pieces whenever possible because excessive background seams can distract from the animal.
Once the complete block is assembled, square it to approximately 18 1/2 x 18 1/2 inches (47 x 47 cm) for an 18-inch finished block.
Do not trim immediately after sewing. Press the entire block first, allow it to cool flat, and then square it carefully with a large quilting ruler.
Quilting, Finishing, Color Variations, and Professional Results
Once the Horse Quilt Block Pattern is complete, it can be used immediately as part of a larger quilt or turned into a standalone mini quilt.
For a wall hanging, add borders around the 18-inch block. A narrow dark brown inner border followed by a wider cream or coordinating outer border can frame the portrait beautifully.
Prepare the quilt sandwich using the completed top, batting, and backing. Smooth each layer carefully to prevent wrinkles.
A low-loft cotton or cotton-blend batting is a good choice because it provides definition without making the small patchwork details excessively bulky.
For quilting, consider using different techniques in the horse and background. Closely spaced quilting in the background can make the horse appear slightly raised.
Simple echo quilting approximately 1/4–1/2 inch (6–12 mm) outside the horse silhouette emphasizes the shape without covering the patchwork.
Inside the mane, quilt along the direction of the fabric pieces. These lines can reinforce the impression of individual strands.
Around the face, keep quilting relatively subtle. Excessively dense stitching can distract from the eye and facial blaze.
The neck can handle more decorative quilting. Gentle curved lines can create additional movement through large printed sections.
After quilting, trim the layers evenly and attach binding using your preferred method.
A 2 1/2-inch (6.4 cm) binding strip works well for standard double-fold binding. Join strips diagonally, press them lengthwise, and attach around the perimeter.
The pattern can also be adapted into a pillow. Add borders until the block reaches the desired cushion dimensions, quilt the front, and attach an envelope or zippered backing.
For a tote bag, consider reducing the block to approximately 12–14 inches (30–36 cm). Remember that smaller versions require greater precision because the facial pieces become significantly smaller.
A realistic chestnut horse can use rust, caramel, chocolate, cream, and black. A palomino version can combine golden tan, cream, ivory, and light brown.
For a black horse, avoid using only solid black. Combine charcoal, black, dark gray, and subtle black-on-black prints so the individual sections remain visible.
A gray horse works beautifully with silver, charcoal, cream, and blue-gray fabrics.
You can even create a colorful art-quilt version using teal, purple, turquoise, pink, or rainbow scraps. The horse remains recognizable because the silhouette and value placement are more important than realistic color.
Suggested Fabric Cutting Plan
| Section | Suggested Fabric | Approximate Amount |
|---|---|---|
| Background | Cream/light beige | 1/2 yard |
| Main face | Chestnut/rust | 1 fat quarter |
| Light face areas | Caramel/light brown | 1 fat eighth |
| Dark shadows | Chocolate brown | 1 fat eighth |
| Mane | 4–6 brown prints | Assorted scraps |
| Facial blaze | White/cream | 8 × 12 in |
| Neck accents | Paisley/plaid prints | Assorted scraps |
| Eye/nostril | Black/dark brown | Small scraps |
| Binding | Coordinating brown | Approx. 1/4 yard |
Always cut foundation-piecing pieces larger than the area they need to cover. Trying to cut them to exact finished dimensions before sewing makes paper piecing unnecessarily difficult.
Tips for Accurate Horse Patchwork
The most important principle is value contrast. Even beautiful fabrics can disappear into one another if they have approximately the same lightness or darkness.
Take a quick black-and-white photograph of your fabric selection. If the mane, face, blaze, and background remain clearly distinguishable without color, your value arrangement is likely strong.
Press instead of aggressively ironing. Moving the iron back and forth can distort bias edges, particularly around triangular pieces.
Use a dry iron or minimal steam while constructing small foundation-pieced units. Save heavier steaming for final blocking if your fabrics tolerate it.
Trim foundation units with an Add-A-Quarter-style ruler or standard acrylic ruler before joining them. Clean seam allowances dramatically improve accuracy.
Do not rush the eye. The eye is a very small element, but it determines much of the personality of the finished horse.
Frequently Asked Questions About the Horse Quilt Block Pattern
Is the Horse Quilt Block Pattern suitable for beginners?
An adventurous beginner can attempt it, but the project is more comfortable for an intermediate quilter because it involves numerous angles, small pieces, and precise alignment.
What technique works best for this horse design?
Foundation paper piecing is an excellent choice for the geometric sections, combined with appliqué for very small details such as the eye and nostril.
What is a good finished block size?
Approximately 18 x 18 inches (45.7 x 45.7 cm) provides enough room for detailed facial features while remaining practical.
What seam allowance should I use?
Use a consistent 1/4-inch (6 mm) seam allowance when joining completed units.
Can I use fabric scraps?
Yes. This is an excellent scrap quilt project, especially for the mane and shaded portions of the horse.
Do all the brown fabrics need to match?
No. In fact, several different browns usually create a more interesting horse. Focus on light, medium, and dark values rather than perfect color matching.
Can the horse be made with appliqué instead?
Yes. A simplified version can be created using raw-edge or turned-edge appliqué instead of foundation piecing.
How can I make the mane look dimensional?
Alternate dark and medium fabrics and arrange elongated pieces in the natural direction of the mane.
How should I create the eye?
A small fusible appliqué eye is usually easier than piecing it. Add a tiny highlight with thread or a small fabric detail.
Can I resize the Horse Quilt Block Pattern?
Yes, but remember that reducing the pattern dramatically makes the smallest sections harder to sew.
Should I prewash my fabrics?
You can prewash them if that is your normal quilting practice. The important thing is to treat all fabrics consistently.
What can I make with the finished horse block?
It works beautifully for wall hangings, throw quilts, pillows, tote bags, barn quilts, equestrian gifts, and children’s room décor.
Start Your Journey to a Healthier Relationship Today
Conclusion
The Horse Quilt Block Pattern is a rewarding project for quilters who enjoy turning fabric into recognizable pictorial designs. By separating the horse into manageable areas—the mane, ears, forehead, eye, blaze, muzzle, jaw, and neck—an apparently complicated portrait becomes a logical sequence of smaller patchwork units.
Fabric selection is just as important as accurate sewing. A successful horse portrait depends on deliberate differences between light, medium, and dark fabrics, with the white blaze and dark eye providing strong focal points. Chestnut solids mixed with subtle plaid, paisley, floral, and tonal fabrics can give the finished block the rich patchwork character seen in the inspiration.
Careful foundation piecing, a consistent 1/4-inch seam allowance, accurate pressing, thoughtful appliqué details, and patient assembly will produce the cleanest result. Once completed, the block can stand alone as an impressive piece of textile art or become the centerpiece of a larger equestrian quilt.
Most importantly, this Horse Quilt Block does not need to be limited to one color palette. Chestnut, palomino, gray, black, paint, or even imaginative multicolored horses can all be created from the same basic concept, making this a pattern that can be personalized again and again.