The Scrappy Star Block Pattern is a cheerful quilting project that turns small pieces of colorful fabric into a striking geometric block with a star-inspired appearance.
It is especially useful for quilters who have a collection of leftover cotton pieces from previous projects and want to transform those scraps into something coordinated and practical.
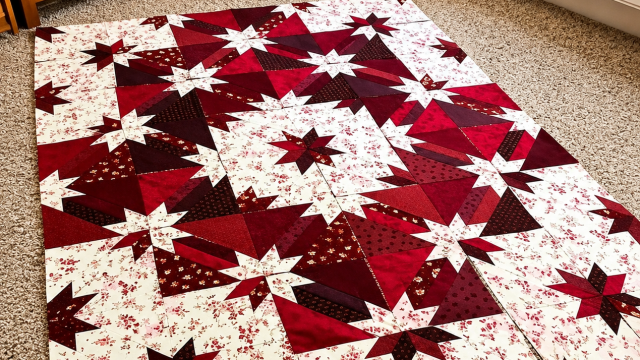
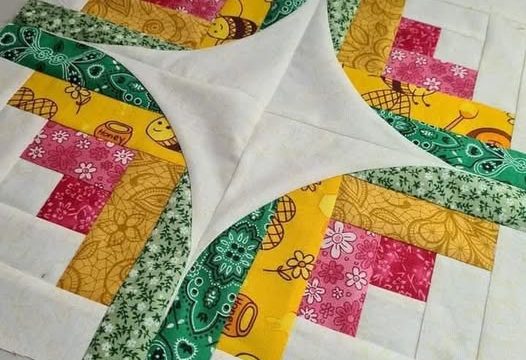
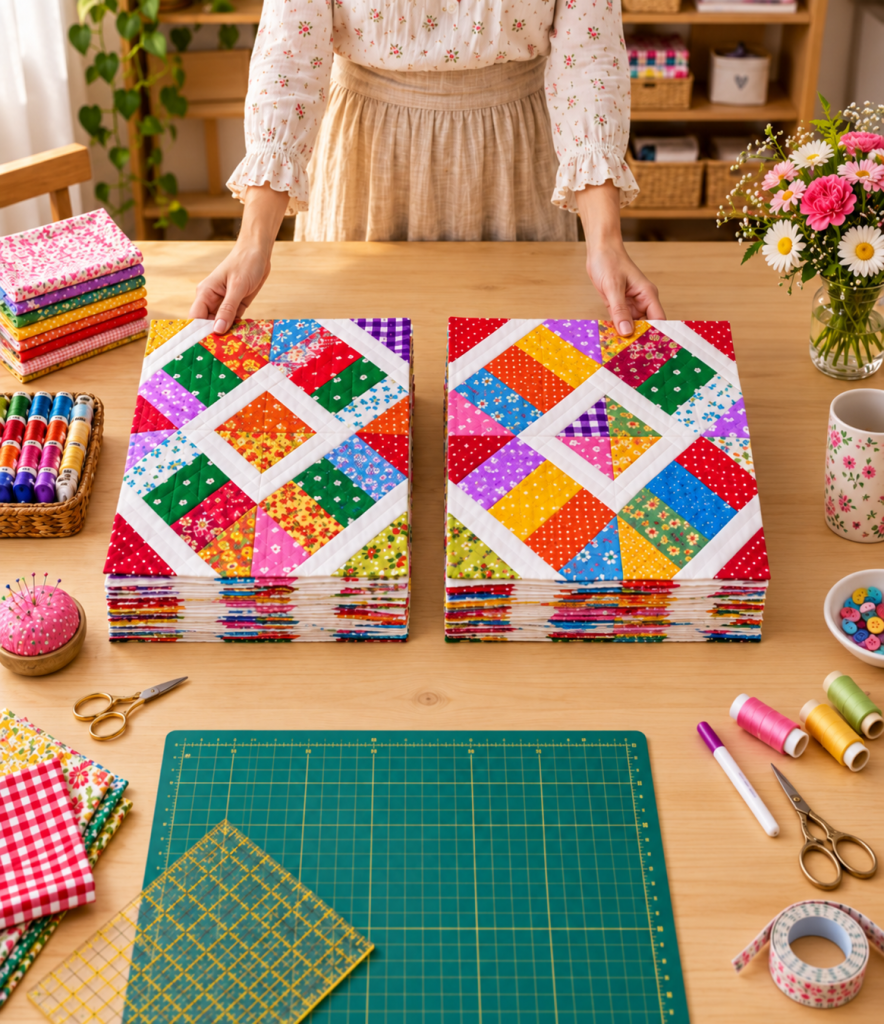
The design shown in the reference image combines bright printed fabrics with crisp white strips, creating strong diagonal lines that organize the many colors and help the central shape stand out.
Although the finished block looks detailed, the construction can be approached in manageable sections using straight seams, careful pressing, and accurate trimming.
The contrast between the colorful scrap fabric, the light background strips, and the central diamond is what gives this quilt block so much personality.
Once you understand how the sections are assembled, the same technique can be repeated to make placemats, table runners, cushions, tote panels, or an entire scrappy quilt.
A Scrappy Star Block Pattern is essentially a patchwork design in which assorted fabric scraps are arranged around a structured geometric framework so the eye sees a star, diamond, or radiating shape.
The word scrappy means that the fabrics do not have to come from one coordinated collection; floral prints, checks, dots, small geometrics, and solids can all be mixed together.
The secret is not making every fabric match, but instead giving all those prints a common structure through consistent cutting and the repeated use of the same background fabric.
In this project, narrow white strips act almost like a frame, separating the stronger colors and forming diagonal pathways through the block.
This makes the design lively without allowing the patchwork to become visually confusing.
For quilters who enjoy colorful sewing projects, it is an excellent way to practice accurate piecing while using fabrics that might otherwise remain forgotten in a scrap basket.
The version explained here is designed as an approachable interpretation of the block shown in the image, and the dimensions can easily be adjusted depending on the size of project you want to create.
A practical goal is a block measuring approximately 12 1/2 inches unfinished, or about 12 inches finished after it is sewn into a larger project.
Using quilting cotton will usually provide the easiest handling because it presses neatly and keeps the many small pieces stable during construction.
A standard 1/4-inch seam allowance is recommended throughout the block so the sections fit together consistently.
The instructions focus not only on assembly but also on fabric selection, cutting, pressing, trimming, and matching diagonal seams, because those details make a noticeable difference in a geometric design.
With patience and careful measuring, this colorful Scrappy Star Block Pattern can become a reliable scrap-friendly block that looks different every time you sew it.
Materials, Fabric Selection, and Planning the Scrappy Star Block
Begin by collecting a variety of quilting cotton scraps in bright colors. The photograph suggests a playful mixture of red, pink, green, blue, orange, yellow, purple, floral, polka-dot, and checked prints. You do not need to reproduce those exact colors. What matters most is having enough contrast so neighboring pieces remain easy to distinguish.
For one block, prepare roughly 10 to 16 different scrap fabrics if you want a highly varied appearance. Smaller collections can also work, but avoid placing identical fabrics next to each other too often. Scraps measuring approximately 2 1/2 to 4 inches wide are useful because they can be cut into rectangles, squares, and triangles without wasting much fabric.
You will also need a light background fabric, preferably white, cream, or another very pale neutral. This fabric creates the diagonal framework that makes the star shape readable. For a single 12-inch finished block, a fat eighth of background fabric is generally more than enough, although preparing extra strips is useful in case something needs to be recut.
Basic quilting tools include a rotary cutter, acrylic ruler, cutting mat, sewing machine, neutral cotton thread, iron, ironing surface, straight pins or quilting clips, and a square ruler for final trimming. A rotating cutting mat can make trimming easier, but it is optional. Accuracy is much more important than having specialized equipment.
Before cutting, arrange several scraps on your table and look for balance. Try distributing very dark fabrics, very light fabrics, and highly saturated colors throughout the layout instead of grouping all similar colors together. This approach helps the scrappy quilt block feel energetic and intentional rather than random.
It is also useful to decide which fabrics will appear near the center. The central diamond is naturally an important focal area, so a warm orange, yellow, red, or another noticeable print can work beautifully there. Surrounding that center with cooler or contrasting colors strengthens the radiating star block pattern effect.
Cutting and Preparing the Patchwork Units
For a 12 1/2-inch unfinished block, start by cutting several colorful rectangles approximately 2 1/2 x 4 1/2 inches. You may need around eight to twelve rectangles depending on the exact arrangement you choose. Some will eventually be trimmed after joining, so having one or two extra pieces is helpful.
Cut several 2 1/2-inch squares from additional scraps. These smaller patches help create color changes around the center and corners. For even more variety, some squares can be cut diagonally once to create half-square triangles. Always handle bias edges gently because they can stretch more easily than straight-grain edges.
From the background fabric, cut narrow strips approximately 1 1/2 inches wide. These strips will form the light diagonal framework. The exact lengths do not all need to be determined before sewing because longer strips can be attached to colorful units and trimmed afterward. This technique is often easier than cutting every diagonal strip to an exact length in advance.
To create the central diamond, cut a colorful square approximately 3 1/2 inches and position it on point, meaning that one corner faces upward instead of having the square sit horizontally. Border this center with white strips, adding one strip at a time and trimming each end after sewing. The result should resemble a bright diamond surrounded by a clean light frame.
Prepare the surrounding colorful sections separately. Combine rectangles and small squares into short patchwork rows, varying the prints as you sew. Press each seam carefully before joining the next piece. These sections do not have to contain identical fabric arrangements because the purpose of a Scrappy Star Block Pattern is to celebrate variation.
As the units are completed, place them around the center on a flat surface before sewing everything together. Rotate pieces until the diagonal white strips begin forming continuous visual lines. Taking a quick photo of the arrangement can help you remember the layout while transferring individual sections to the sewing machine.
Step-by-Step Piecing and Assembly
Start with the central unit because it establishes the orientation of the entire block. Place one background strip right sides together along one edge of the center square and sew with a consistent 1/4-inch seam allowance. Press the seam toward the darker fabric if possible, then repeat on the remaining sides until the colorful center is surrounded.
Next, construct four surrounding patchwork sections. Each section can contain two or three colorful rectangles or squares joined together. Try alternating warm and cool tones. For example, orange can sit beside blue, purple beside yellow, or red beside green. These combinations create the lively contrast visible in a traditional scrappy quilt pattern.
Add a white strip diagonally along the inner side of each surrounding section. Once sewn and pressed, this white strip should visually connect with the border around the central diamond. Trim excess fabric carefully while preserving enough seam allowance for the next stage. Repeating this process creates the recognizable radiating framework.
Place two opposite sections beside the center and check the alignment before sewing. Pin where the white strips meet because even a small shift can interrupt the diagonal line. Sew slowly across bulky seam intersections. Press the newly joined seams carefully without dragging the iron across the fabric.
Add the remaining sections using the same method. At this stage, the block may look slightly oversized or uneven around the edges, which is normal for a design containing diagonal piecing. The important thing is that the central motif remains centered and the white lines appear continuous.
When all major sections are connected, press the entire Scrappy Star Block Pattern from the wrong side first and then lightly from the front. Place a square quilting ruler over the block and trim it to 12 1/2 inches square. Keep the central diamond aligned with the ruler’s diagonal markings so the completed design remains symmetrical.
Pressing, Trimming, Quilting, and Creative Variations
Good pressing is one of the easiest ways to improve the appearance of this project. Instead of aggressively moving the iron back and forth, lower it onto the seam, allow the heat to set the stitches, and then open or press the seam to one side. This reduces distortion, especially around diagonal sections.
If several seams meet in one location, consider pressing some seams open to reduce bulk. A flatter intersection is easier to quilt and produces a cleaner finished surface. However, either pressing method can work successfully as long as you remain consistent and avoid stretching the fabric.
After trimming, measure the block in several places. The width should be the same across the top, middle, and bottom. If it is slightly smaller than expected, do not continue trimming aggressively. A block that is a fraction of an inch small can often still be used successfully if all blocks in the project are adjusted consistently.
To turn one block into a small finished project, layer the patchwork with batting and backing fabric. Quilt along the diagonal white strips to emphasize the geometry, or use simple straight-line quilting approximately 1/4 inch away from major seams. This creates texture without competing with the colorful fabric prints.
For a larger quilt, make multiple versions of the Scrappy Star Block Pattern and rotate some blocks by 90 degrees before joining them. Repeating the white diagonal lines across several blocks can create secondary diamonds, zigzags, and star shapes. Using different scraps in every block keeps the quilt interesting while the repeated white fabric unifies the complete design.
You can also create themed versions. Christmas scraps in red, green, white, and gold can produce a festive quilt. Soft pastels can create a gentle cottage-style version, while jewel tones against black or charcoal background fabric produce a more dramatic appearance. The construction remains essentially the same, making this pattern easy to customize.
FAQ – Frequently Asked Questions About the Scrappy Star Block Pattern
What is a Scrappy Star Block Pattern?
A Scrappy Star Block Pattern is a patchwork quilt block that uses several different fabrics arranged to create a star-like or radiating geometric design. The scraps may come from unrelated fabric collections, while a repeated background color helps bring the entire block together.
Is this pattern suitable for beginners?
Yes, confident beginners can make this block. The sewing itself mainly involves straight seams. The more challenging part is maintaining accurate seam allowances and matching diagonal sections. Working slowly and trimming sections as you go makes the construction much easier.
What is the best fabric for this quilt block?
Medium-weight 100% quilting cotton is an excellent choice because it is stable, easy to cut, and simple to press. Try to use scraps with a similar fabric weight. Mixing very lightweight fabric with heavy fabric can make the block difficult to press evenly.
How many fabric colors should I use?
There is no fixed number. Eight to sixteen different prints can create a strong scrappy appearance, but even four or five colors can work. More important than the exact number is the distribution of light, medium, and dark values throughout the block.
Why are the white strips important?
The white strips create contrast and define the geometric structure. Without them, the colorful pieces can visually blend together. These light strips act as pathways that lead the eye around the block and help create the central star or diamond effect.
Can I make the block larger or smaller?
Yes. The Scrappy Star Block Pattern can be resized by changing the dimensions of the center square, surrounding rectangles, and background strips proportionally. When experimenting with another size, make one test block before cutting fabric for an entire quilt.
What seam allowance should I use?
A consistent 1/4-inch quilting seam is recommended. Small inconsistencies can accumulate as several sections are joined, causing the finished block to become too small or preventing the diagonal lines from matching properly.
Should I wash the fabric before sewing?
Prewashing is optional for quilting cotton, but consistency is important. If most of your scraps were previously washed, it may be better to wash new fabrics as well. If none of the fabrics have been washed, they can usually be used together without prewashing.
How can I keep the block from becoming distorted?
Avoid pulling the fabric while sewing, use a sharp rotary cutter for accurate pieces, press rather than aggressively ironing, and handle diagonal bias edges carefully. Trimming intermediate units before final assembly can also improve accuracy.
Can I use leftover jelly roll strips?
Yes. Precut strips can be very useful for the colorful rectangular sections or the light diagonal framing, depending on their width. They are especially convenient when creating several blocks with a wide variety of coordinated colors.
What can I make with just one block?
One block can become a pillow front, table mat, oversized potholder, tote bag panel, mini wall quilt, or decorative center for a larger patchwork project. Adding borders is an easy way to increase its finished dimensions.
How do I choose colors without making the block look too busy?
Let one consistent background fabric control the design. Then spread similar colors across different areas instead of placing them all together. Combining small-scale prints with a few calmer fabrics also gives the eye places to rest.
Why do my diagonal white strips not match perfectly?
This usually happens because of a small difference in seam allowance, cutting accuracy, or placement. Before sewing two sections together, insert a pin directly through the matching seam points. Pinning at the intersection helps prevent one section from shifting.
Can I make an entire quilt using this block?
Absolutely. Repeating the Scrappy Star Block Pattern creates an impressive quilt because the diagonal lines can connect across neighboring blocks. You can arrange the blocks in a straight setting or rotate alternating blocks to create additional secondary patterns.
Conclusion
The Scrappy Star Block Pattern is a creative way to transform small leftover fabrics into a colorful quilt block with a strong geometric personality. The project begins with careful fabric selection, accurate cutting, and a contrasting background fabric that gives structure to the many different prints.
Throughout the process, you learned how to prepare a central diamond, combine scrap rectangles and squares, add narrow background strips, organize the surrounding sections, match diagonal seams, press carefully, and square the block to approximately 12 1/2 inches unfinished. These fundamental quilting skills can also be applied to many other patchwork designs.
The greatest advantage of a scrappy quilt block is that every version can be unique. Even when the same construction method is repeated, changing the placement of prints and colors creates a completely different result. That makes the pattern especially useful for reducing a fabric scrap collection while creating something colorful and practical.
You can use one finished block for a small sewing project or repeat the design to create a complete quilt filled with secondary stars, diamonds, and diagonal pathways. Take your time with the seam intersections, keep your 1/4-inch seam allowance consistent, and check the layout before joining each major section.
Most importantly, enjoy experimenting with your own fabric combinations. Scrappy quilting does not require every print to match perfectly; the repeated geometry provides the visual connection while the different colors give the project its charm.