Crochet Bag Easy Pattern – Step-by-Step Tutorial
If you’re looking for a fun and practical crochet project, making a crochet bag is a fantastic idea! This Crochet Bag Easy Pattern is beginner-friendly and perfect for daily use or as a handmade gift. Whether you’re new to the craft or already experienced with crochet patterns, this tutorial will guide you through each step with simplicity and clarity.
In this article, we’ll walk you through the materials you need, provide a simple and stylish bag pattern, and share useful tips along the way. By the end of this guide, you’ll have a beautiful handmade crochet bag that reflects your style and creativity. Let’s dive in!
Before you start your crochet project, gather all the necessary materials. Preparing ahead will make the process smoother and more enjoyable. You don’t need a lot to make this easy crochet bag—just the basics.
Yarn: 2 skeins of worsted weight cotton yarn (100g each)
Crochet hook: Size 5.0 mm (H/8)
Scissors, tapestry needle, and stitch markers
Optional: magnetic button or zipper for closure
Cotton yarn is recommended for durability and easy maintenance. You can also use acrylic or recycled yarn depending on your preference and budget. Try to choose a yarn that has a sturdy structure so the bag can hold its shape.
Selecting the right crochet pattern is crucial, especially if you’re a beginner. The good news is this bag pattern uses basic stitches like single crochet (sc), half double crochet (hdc), and slip stitch (sl st). These stitches are easy to learn and produce a tight, neat fabric perfect for bags.
We’ll be working in the round, creating the bag from the bottom up. The bag will have a solid base and a lightly textured body using half double crochets. You can keep it plain or play with stripe colors to customize it. Simple and versatile—exactly what beginners need!
If you’d like, browse online for other crochet patterns to get inspired by shapes, sizes, and color schemes. Even small changes in yarn color or stitch choice can personalize your final result.
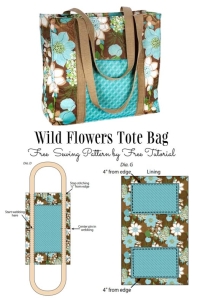
This is a detailed step-by-step tutorial for a tote-style crochet bag. The pattern is straightforward and gives you a sturdy bag that can be used for shopping, the beach, or everyday errands.
Chain 31.
Row 1: Single crochet (sc) in second chain from hook and across (30 sts). Turn.
Row 2–10: sc in each stitch across. Turn.
The base creates a strong foundation for the bag. These rows will form a rectangle, and later we’ll work around it to build up the bag. Use stitch markers at each corner to keep your shape precise as you go.
Begin working in the round by crocheting along the edge of the rectangle.
Round 1: sc evenly around the rectangle, placing 3 sc in each corner. Join with a slip stitch.
Round 2–20: hdc in each stitch around. Join each round with a slip stitch and chain 1.
You should now see the sides of the bag forming as you build up each round. The crochet technique used here—half double crochet—gives a beautiful texture while being faster to work up than single crochet. Make sure your tension remains consistent.
If you want a taller bag, feel free to add more rounds. Just make sure both sides are even and symmetrical. You can also alternate colors every few rows for a striped effect.
Place stitch markers where you want your handles to begin and end, about 5 inches apart on each side.
Round 21: hdc to first marker, chain 30 (or desired length), skip stitches between markers, hdc to next marker, repeat for second handle. Join.
Round 22–23: hdc in each stitch and chain across handles to reinforce.
Crocheting the handles directly into the bag adds strength and ensures they don’t stretch out over time. For longer straps, simply add more chains when forming the handles. You can even line them later with fabric for extra durability.
Handles can be customized based on your needs—make them short for a handbag or long for a shoulder bag. This is the beauty of handmade work!
Once the handles are complete, it’s time to add the finishing touches. Weave in all loose ends with a tapestry needle and trim any excess yarn. Your bag is now complete, but if you want to go further, there are some fun ways to personalize it.
Add a magnetic snap closure or sew in a zipper if you want extra security. You can also line your bag with fabric to give it a polished look and prevent stretching. Simply cut a piece of fabric the same size as your bag and hand-sew or machine-sew it inside.
Another fun touch? Add tassels, beads, or small crocheted flowers. These embellishments make your project stand out and give it a personal, creative flair. It’s all about expressing your own style.
Creating a crochet bag is easy when you follow the steps, but these tips can help elevate your work. Always check your gauge—crochet too tight, and your bag will be stiff; too loose, and it won’t hold its shape.
Use stitch markers to keep track of your rounds and handle placement. This avoids uneven handles or crooked seams. Also, keep your yarn tension consistent from start to finish. Even a small shift in tension can make one side of the bag taller than the other.
Finally, take breaks! Crocheting is a relaxing and rewarding hobby, but your hands and wrists need rest. Stretch between sessions and stay hydrated for optimal comfort.
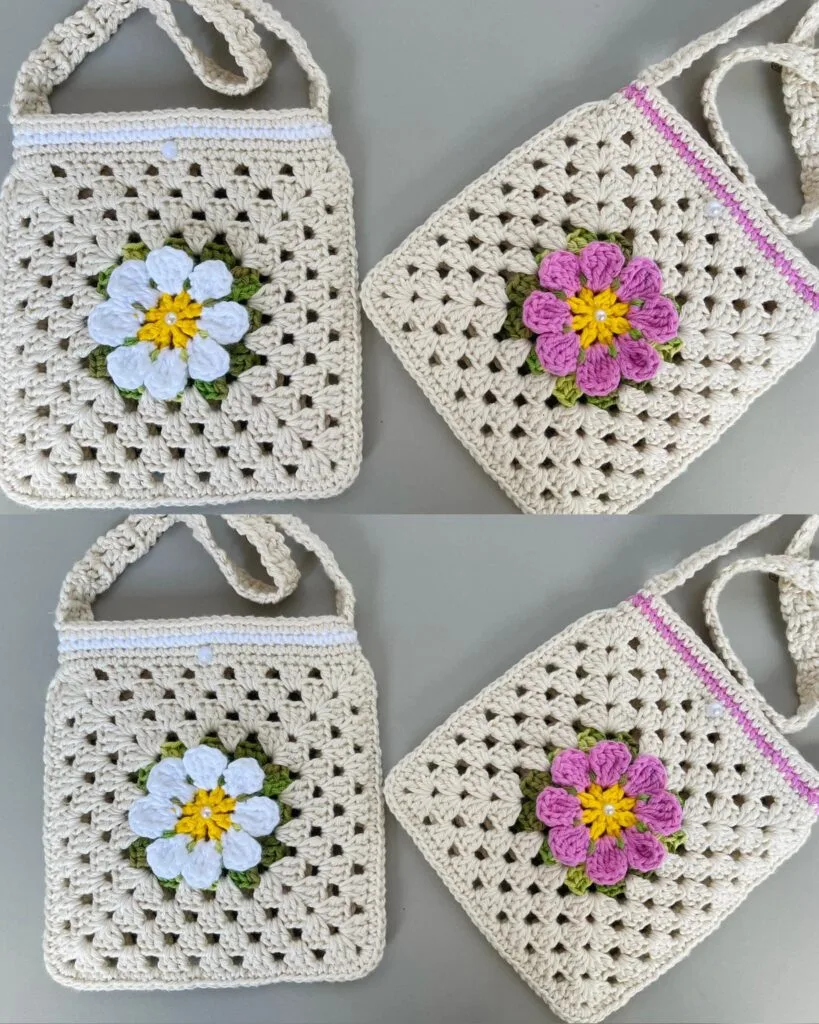
This Crochet Bag Easy Pattern is perfect for beginners because it uses fundamental crochet stitches, follows a repeatable structure, and finishes quickly. It also offers room for creativity—whether you want to add colors, patterns, or extra details.
Learning how to read crochet patterns and understanding the flow of a bag project builds confidence. As you practice, you’ll gain better control of stitch size, tension, and pattern variations. Start simple, and then expand your skills!
Plus, creating a functional item like a bag feels incredibly rewarding. You’ll carry it proudly, knowing you made it with your own hands. Handmade accessories are also wonderful gifts that showcase your care and effort.
Once you complete your first crochet bag, you might want to try other styles or accessories. Luckily, there’s a vast world of crochet patterns available online for free or purchase. Look for bags with textures like bobble stitches, cables, or lace for your next challenge.
You can find patterns on websites like Ravelry, Etsy, Pinterest, and crochet blogs. There are even apps specifically for crochet lovers that help you track your projects, stitch counts, and yarn inventory.
Joining crochet groups online or on social media platforms is another great way to find support, feedback, and pattern ideas. Don’t be afraid to share your work and ask questions—you’re part of a global community of crafters!
[botao link={https://youtu.be/vjIGZyaOI98} texto={PATTERN HERE} corfundo={#183396} corletra={#fff}]
Making your own crochet bag is a delightful journey into creativity, practicality, and craftsmanship. With this Crochet Bag Easy Pattern, you’ve learned how to create something useful and beautiful, step-by-step.
This guide is just the beginning. The more you explore different crochet patterns, the more confident and creative you’ll become. So grab your hook, choose your yarn, and start stitching your next masterpiece!
Don’t forget to save this tutorial and share it with fellow crochet enthusiasts. Happy crocheting!