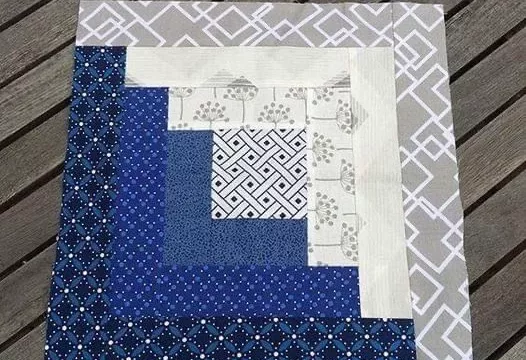
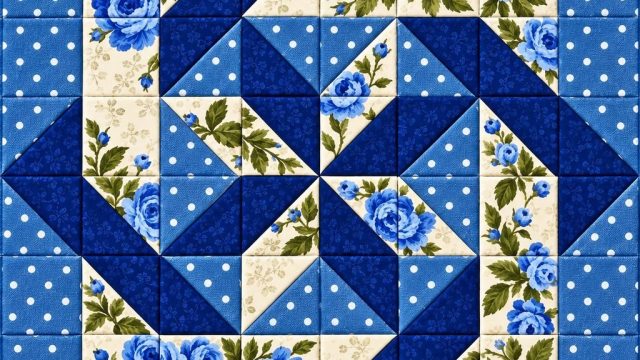
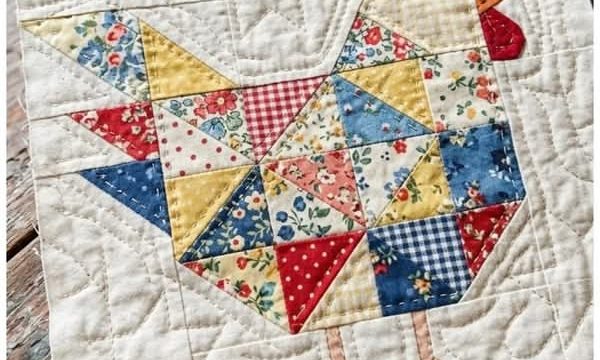
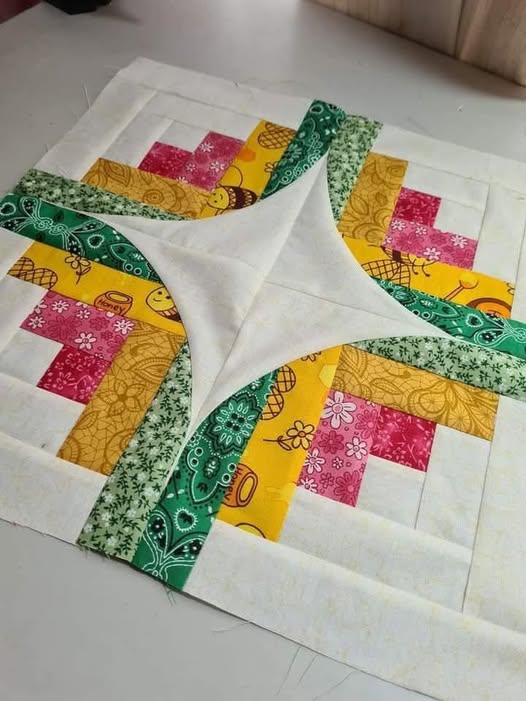
The Curved Log Cabin Pattern is a beautiful quilting technique that creates the illusion of graceful curves even though the individual fabric pieces are mostly cut as straight strips and rectangles. The quilt block shown in the photo is especially striking because it combines a clean white background with cheerful yellow, pink, light green, and dark green fabrics. When several blocks are positioned together, the contrasting strips appear to bend around the center and create a spinning or pinwheel-like movement. This optical effect is one of the reasons the Curved Log Cabin quilt block remains so popular with quilters who enjoy traditional construction with a more modern appearance. Another advantage is that the technique can be made with fabric scraps, precut strips, or coordinated yardage. With accurate cutting, careful pressing, and consistent seam allowances, even a confident beginner can achieve an attractive result.
Unlike a traditional Log Cabin block where strips are usually similar in width, the Curved Log Cabin Pattern depends on changing the widths of the strips to create visual movement. Narrow pieces placed along one side and wider pieces positioned along another cause the finished block to appear rounded once several units are joined together. There are no complicated curved seams required for this style, which makes the construction much easier than its finished appearance might suggest. In the project shown in the photo, white fabric creates generous negative space while colorful printed strips become the main design feature. The combination of strong dark green strips and softer floral fabrics further emphasizes the direction of the design. Choosing fabrics with enough contrast is therefore just as important as sewing the strips accurately.
This tutorial explains a practical way to recreate a project inspired by the photograph while allowing you to adjust the dimensions according to your preferred finished size. We will cover fabric selection, approximate measurements, strip placement, block construction, pressing, trimming, and final assembly. You will also learn why strip width creates the curved illusion and how rotating the completed blocks changes the overall design. The method can be used for a table topper, wall hanging, pillow front, placemat, or even a larger quilt once you become comfortable making the blocks. Beginners should consider making four blocks first because this is enough to clearly see the circular effect shown in the reference project. Most importantly, take your time during cutting and pressing because precision greatly improves the finished Curved Log Cabin Pattern.
Materials, Measurements, and Fabric Choices for the Curved Log Cabin Pattern
For a four-block sample similar to the project in the image, begin with approximately 1 yard (0.9 m) of white or cream fabric for the background and several colorful scraps measuring at least 2½ inches (6.4 cm) wide. You can use pink, yellow, green, floral, geometric, or novelty prints depending on the look you want. The photograph demonstrates how effectively warm colors such as yellow and pink can contrast against cooler green fabrics. A strong dark print works particularly well as an accent because it defines the apparent curve. Using a mixture of small-scale and medium-scale prints also creates more visual interest.
You will also need a rotary cutter, quilting ruler, cutting mat, sewing machine, neutral cotton thread, iron, and ironing surface. A sharp rotary cutter makes it easier to maintain accurate strip widths, which is essential for the optical effect. A ¼-inch quilting foot is useful because the entire block should be assembled using a consistent ¼-inch seam allowance. If the seam width changes from one strip to another, the block can become distorted. Accurate seams also help multiple blocks meet neatly when they are joined together.
For a beginner-friendly version, aim for unfinished blocks of approximately 10½ to 12½ inches (26.7 to 31.8 cm). Four completed blocks can then produce a central quilt section measuring roughly 20 to 24 inches (50.8 to 61 cm) before borders are added. These measurements are flexible because the Curved Log Cabin Pattern can easily be enlarged or reduced. The important factor is maintaining the relationship between the narrow and wide strips rather than following one mandatory finished size. Always make the blocks slightly larger than necessary so they can be squared after construction.
Start each block with a small center square measuring approximately 2½ inches (6.4 cm). In the photograph, the center portions appear to include colorful pink or yellow prints surrounded by white and contrasting strips. You can begin with a 2½-inch square and build outward in traditional Log Cabin order. One group of strips can be approximately 1¼ inches (3.2 cm) wide while the opposite group can measure approximately 2 inches (5.1 cm) wide. This difference in strip width creates the visual bending effect.
Prepare enough strips before beginning the sewing process. For four blocks, cutting several white strips in both narrow and wider widths will make construction faster. Cut colorful strips from your yellow, pink, green, and floral fabrics in similar width groups. You do not need every strip to come from the same fabric because scrap quilting works beautifully with this design. In fact, changing prints while keeping a consistent color family can make the quilt appear more dynamic.
Before cutting all your fabric, create one test block. This allows you to determine whether you prefer a stronger or softer curved appearance. Greater differences between the narrow and wide strips generally produce more dramatic visual movement, while smaller differences create a gentler curve. Keep in mind that the block itself will still be square. The apparent curve appears because the seams gradually shift as the strips become wider on one side and narrower on the opposite side.
How to Sew the Curved Log Cabin Quilt Block Step by Step
Begin by placing your 2½-inch center square on the work surface. Sew the first narrow strip to one side using a ¼-inch seam allowance, then press the seam carefully. Add the next strip to the adjacent side, continuing around the center in the same direction. Traditional Log Cabin construction works by adding strips sequentially around a center unit. Press after every seam rather than waiting until the block is completed because flat seams improve both accuracy and appearance.
Continue adding the narrow strips around one portion of the block. Trim every strip so its length matches the edge to which it is being sewn. Avoid cutting all strip lengths in advance because small variations in seam allowance can change the required measurements. Sewing from longer strips and trimming after attachment is often easier for beginners. Use your ruler to verify that the edges remain straight after every few rounds.
On the opposite portion of the block, introduce the wider strips. This difference is the most important construction feature of the Curved Log Cabin Pattern. As the wider pieces accumulate, they visually expand one portion of the block while the narrow strips compress the other portion. Once the block is viewed from a distance, the boundary between colors appears to curve. Yet every seam can still be sewn as a straight line.
To recreate the appearance in the photo, alternate white strips with colorful printed pieces rather than making every round identical. For example, a pink center can be followed by white, yellow, white, light green, and finally a stronger dark green accent. Another block might begin with yellow and use pink as a secondary color. Keeping the same general strip-width sequence while changing the fabric placement gives the finished quilt a coordinated scrappy Log Cabin appearance.
Continue building outward until the block is slightly larger than your desired unfinished measurement. If you want a 10½-inch block, for example, stop once the construction extends beyond that size. Place a square quilting ruler over the block and align the center carefully. Trim all four edges so the finished unit measures exactly 10½ inches square. Squaring every block to an identical measurement is particularly important when four units will meet in the center.
Make three additional blocks using the same basic construction method. Try to maintain the same location for the narrow and wide strips on every block because this allows them to create a continuous curved shape when rotated. Your fabric colors can vary, but the structural placement should remain consistent. Once all four blocks are complete, lay them on a table before sewing them together. Rotate each block until the strongest curved sections point toward the center and create the pinwheel effect visible in the photograph.
Creating the Curved Pinwheel Effect and Joining the Blocks
The most exciting stage of the Curved Log Cabin Pattern is arranging the finished blocks. Place four blocks in a two-by-two formation and rotate them one at a time. Position the wider colorful sections so they appear to sweep around the central meeting point. When the blocks are arranged correctly, the straight seams suddenly create an almost circular appearance. This visual transformation is what makes the design so impressive.
Look carefully at the distribution of dark and light fabrics before sewing the blocks together. Strong dark green pieces like those seen in the photograph can help define the rotating shape. Lighter green and yellow strips can then soften the transition between the dark accent and white background. Pink sections provide another focal point without competing too strongly with the green. Good fabric contrast helps the eye recognize the intended curve immediately.
Once you are satisfied with the arrangement, sew the two blocks in the top row together using a ¼-inch seam. Repeat for the bottom pair. Press the row seams in opposite directions so they can nest when the rows are joined. Then align the central intersection carefully and pin or clip it before stitching the two rows together. Accurate alignment creates a clean central point.
After joining the four blocks, press the central seams carefully without stretching the fabric. Because many seams meet around the middle, the area may become slightly bulky. Pressing seams to alternate sides can help distribute this thickness. Some quilters also prefer pressing the final joining seam open. Either technique can work as long as the quilt top remains flat.
The four-block design can be used exactly as it is for a small quilted table topper or decorative wall piece. You can also add white borders around the outside to frame the colorful curved sections. A 2½-inch to 4-inch border can provide enough space for quilting while maintaining the clean background appearance seen in the photograph. For a larger project, simply repeat the block construction and experiment with additional rotations.
Different layouts can completely change the appearance of this pattern. Four blocks can produce a circular pinwheel, while sixteen blocks can create repeating waves or flower-like forms. A long row of blocks can create an attractive curved border for a bed quilt. This versatility is one reason learning the Curved Log Cabin quilt technique is so useful. Once you understand how the narrow and wide strips control visual movement, you can create many original layouts from the same basic block.
Quilting, Finishing, and Tips for a Professional Result
Before quilting, measure your completed quilt top and cut batting and backing approximately 2 to 3 inches (5 to 7.6 cm) larger on every side. Smooth the backing fabric, place the batting on top, and position the quilt top over the batting. This creates the traditional quilt sandwich. Baste the layers with safety pins, temporary basting spray, or long hand-basting stitches according to your preferred method.
Simple quilting works particularly well for a colorful Curved Log Cabin Pattern because the piecing already provides plenty of visual interest. Straight-line quilting approximately ½ inch (1.3 cm) from selected seams can emphasize the structure without overwhelming it. You can also follow the apparent curves created by the fabric placement using gentle free-motion quilting. Keeping the quilting relatively simple allows the colorful strips to remain the main focus.
If you are new to machine quilting, begin near the center and gradually work toward the edges. Smooth the layers frequently to prevent wrinkles or folds. A walking foot can help feed multiple layers evenly during straight-line quilting. Use a slightly longer stitch length than you used during piecing. Always test your quilting stitches on a fabric sandwich made from leftover scraps before quilting the actual project.
Once quilting is finished, trim the excess batting and backing so all layers are even with the quilt top. Prepare double-fold binding approximately 2¼ to 2½ inches (5.7 to 6.4 cm) wide. Join the binding strips with diagonal seams, press them in half lengthwise, and sew the binding around the quilt using a consistent seam allowance. Fold it over the raw edge and finish it by machine or hand.
For the cleanest result, examine the finished project from several feet away. The curved quilt illusion should appear stronger at a distance than it does when you are looking closely at individual seams. If the curves are difficult to see, stronger contrast can be used in future blocks. Dark green against white, for example, creates a much more obvious line than two similar light colors. Color value often affects the illusion more than the actual print design.
Finally, remember that precision matters, but handmade quilts do not need to be mathematically perfect to be beautiful. Small differences in strip lengths or intersections usually become much less noticeable once the entire design is assembled and quilted. Focus on maintaining consistent seam allowances, accurate block sizes, careful pressing, and strong contrast between your main fabrics. These habits will improve not only this Curved Log Cabin Pattern, but almost every patchwork project you make.
Frequently Asked Questions About the Curved Log Cabin Pattern
What is a Curved Log Cabin Pattern?
A Curved Log Cabin Pattern is a variation of the traditional Log Cabin quilt block that uses strips of different widths to create the optical illusion of curved seams. Most versions are constructed almost entirely with straight pieces of fabric.
Do I need to sew actual curved seams?
Usually, no. One of the greatest advantages of this technique is that the curved appearance can be produced with straight strips. Narrow strips on one side and wider strips on another gradually shift the visual center and create the impression of a curve.
Is the Curved Log Cabin suitable for beginners?
Yes, especially for beginners who already understand basic rotary cutting and ¼-inch seams. Making one practice block before cutting an entire quilt is recommended because it helps you understand how the different strip widths affect the design.
What size should the blocks be?
There is no single required block size. Blocks between approximately 8 and 14 inches are common and practical for many projects. A 10½-inch or 12½-inch unfinished block is a convenient starting point for a four-block sample.
What fabrics work best for this quilt pattern?
Quilting cotton is an excellent choice. Use noticeable contrast between light and dark fabrics to strengthen the curved illusion. White or cream backgrounds combined with yellow, pink, green, blue, red, or other saturated prints can produce beautiful results.
Can I make this project with fabric scraps?
Absolutely. This design is excellent for scrap quilting because every strip can feature a different print. For a balanced appearance, organize scraps into general color families and repeat several colors throughout the blocks.
Why does my block not look curved?
The most common reason is insufficient difference between the narrow and wide strips. The illusion may also disappear if all fabrics have similar values. Increase the difference between strip widths and use stronger contrast between the curved section and the background.
Should I press seams open or to one side?
During block construction, pressing seams to one side is usually convenient and helps maintain structure. When joining completed blocks, you can press seams in opposite directions so intersections nest together. At bulky central intersections, pressing a seam open can sometimes produce a flatter result.
Can the pattern be used for a full-size quilt?
Yes. Simply make additional blocks and arrange them in repeating rotations. A larger number of Curved Log Cabin blocks can create circles, waves, flowers, spirals, and many other secondary patterns depending on how they are positioned.
How can I make the curve more dramatic?
Increase the difference between your narrow and wide strip measurements. You can also place very dark fabric beside a very light background. These two changes make the visual curve stronger and easier to recognize.
Conclusion
The Curved Log Cabin Pattern is a creative example of how simple patchwork techniques can produce a surprisingly sophisticated quilt design. By starting with a small center square, adding straight strips in sequence, and intentionally combining narrow strips with wider ones, you can create an impressive curved illusion without having to sew difficult curved seams.
Throughout this tutorial, we covered fabric selection, strip widths, accurate ¼-inch seam allowances, pressing, trimming, block rotation, four-block assembly, quilting, and binding. We also explored how contrast between white background fabric and stronger colors such as yellow, pink, light green, and dark green can emphasize the flowing shape shown in the reference project. These same principles can be adapted to many different color combinations and finished sizes.
Start with four blocks if this is your first attempt at the technique. Once you see how dramatically the design changes simply by rotating the blocks, you can experiment with larger quilts, table runners, pillows, wall hangings, and your own original layouts. The Curved Log Cabin Pattern offers an excellent balance between traditional quilting construction and modern visual movement, making it a rewarding project for both new and experienced quilters.